- 1. 创建Spring Boot应用
- 2. 安装spring-boot feature
- 3. 创建对应的server
- 4. 准备server.xml,并将jar包赋值到
wlp/usr/servers/hifreud/apps目录下 - 5. 启动并验证
- 6. Docker 方式运行此应用
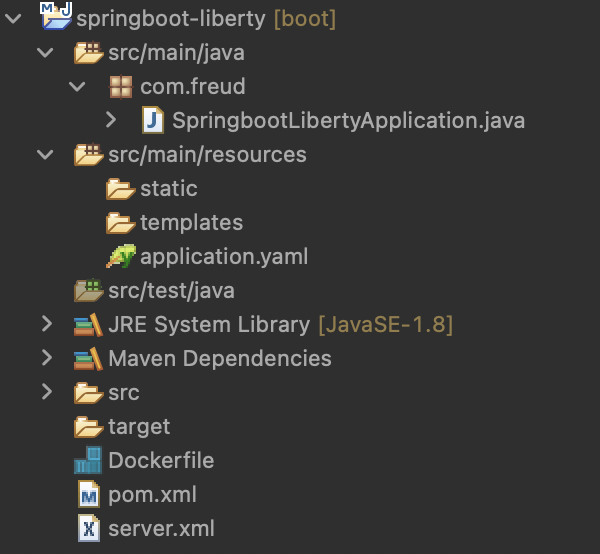
- 附 - 项目目录
1. 创建Spring Boot应用
pom.xml
<?xml version="1.0" encoding="UTF-8"?>
<project xmlns="http://maven.apache.org/POM/4.0.0" xmlns:xsi="http://www.w3.org/2001/XMLSchema-instance"
	xsi:schemaLocation="http://maven.apache.org/POM/4.0.0 https://maven.apache.org/xsd/maven-4.0.0.xsd">
	<modelVersion>4.0.0</modelVersion>
	<parent>
		<groupId>org.springframework.boot</groupId>
		<artifactId>spring-boot-starter-parent</artifactId>
		<version>2.6.7</version>
		<relativePath/> <!-- lookup parent from repository -->
	</parent>
	<groupId>com.example</groupId>
	<artifactId>springboot-liberty</artifactId>
	<version>0.0.1-SNAPSHOT</version>
	<properties>
		<java.version>11</java.version>
	</properties>
	<dependencies>
		<dependency>
			<groupId>org.springframework.boot</groupId>
			<artifactId>spring-boot-starter-web</artifactId>
		</dependency>

		<dependency>
			<groupId>org.springframework.boot</groupId>
			<artifactId>spring-boot-starter-test</artifactId>
			<scope>test</scope>
		</dependency>
	</dependencies>

	<build>
		<finalName>springboot-liberty</finalName>
		<plugins>
			<plugin>
				<groupId>org.springframework.boot</groupId>
				<artifactId>spring-boot-maven-plugin</artifactId>
			</plugin>
		</plugins>
	</build>

</project>
SpringbootLibertyApplication
package com.freud;

import org.springframework.boot.SpringApplication;
import org.springframework.boot.autoconfigure.SpringBootApplication;
import org.springframework.web.bind.annotation.GetMapping;
import org.springframework.web.bind.annotation.RestController;

@SpringBootApplication
@RestController
public class SpringbootLibertyApplication {

	@GetMapping("/hello")
	public String hello() {
		return "hello";
	}

	public static void main(String[] args) {
		SpringApplication.run(SpringbootLibertyApplication.class, args);
	}

}
application.yaml
server:
  servlet:
    context-path: /hifreud
2. 安装spring-boot feature
$ cd wlp/bin
# 查看已经安装的所有Features
$ ./productInfo featureInfo
# 安装所需的features
$ ./featureUtility installFeature springBoot-2.0
Initializing ...
Using 8 threads to download artifacts.
Resolving remote features. This process might take several minutes to complete.
Preparing assets for installation. This process might take several minutes to complete.
Establishing a connection to the configured Maven repository ...
This process might take several minutes to complete.
Successfully connected to the configured repository.
Downloading required features ...
Starting installation ...
Successfully installed feature springBoot-2.0.
Successfully installed feature jaxrsClient-2.0.
Successfully installed feature servlet-3.1.
Successfully installed feature jaxrs-1.1.
Successfully installed feature cdi-1.2.
Successfully installed feature restConnector-1.0.
Successfully installed feature jaxrs-2.0.
Successfully installed feature servlet-3.0.
Successfully installed feature jsonp-1.0.
Successfully installed feature jsp-2.2.
All features were successfully installed.
Start product validation...
Product validation completed successfully.
3. 创建对应的server
$ cd wlp/bin
# 创建Server
$ ./server create hifreud

Server hifreud created.
4. 准备server.xml,并将jar包赋值到 wlp/usr/servers/hifreud/apps 目录下
server.xml
<?xml version="1.0" encoding="UTF-8"?>
<server description="CPDS Server">

    <!-- Enable features -->
    <featureManager>
        <feature>springBoot-2.0</feature>
        <feature>servlet-3.1</feature>
    </featureManager>

    <!-- To access this server from a remote client add a host attribute to the following element, e.g. host="*" -->
    <httpEndpoint id="defaultHttpEndpoint"
                  httpPort="9080"
                  host="*" />

    <springBootApplication location="springboot-liberty.jar">
    </springBootApplication>

</server>
生成jar包并拷贝至 wlp/usr/servers/hifreud/apps 目录下
$ mvn clean install
5. 启动并验证
启动服务
$ cd wlp/bin
# 创建Server
$ ./server start hifreud

Starting server hifreud.
Server hifreud started with process ID 38852.
验证
$ curl -v http://localhost:9080/hifreud/hello
*   Trying 127.0.0.1:9080...
* Connected to localhost (127.0.0.1) port 9080 (#0)
> GET /hifreud/hello HTTP/1.1
> Host: localhost:9080
> User-Agent: curl/7.79.1
> Accept: */*
>
* Mark bundle as not supporting multiuse
< HTTP/1.1 200 OK
< X-Powered-By: Servlet/3.1
< Content-Type: text/plain;charset=UTF-8
< Content-Length: 5
< Content-Language: en-CN
< Date: Tue, 17 May 2022 07:06:07 GMT
<
* Connection #0 to host localhost left intact
hello%
停止服务
$ ./server stop hifreud

Stopping server hifreud.
Server hifreud stopped.
6. Docker 方式运行此应用
Dockerfile
FROM docker.io/library/websphere-liberty:20.0.0.9-full-java8-ibmjava

#拷贝jar包
COPY --chown=1001:0  target/springboot-liberty.jar /config/apps/springboot-liberty.jar

COPY --chown=1001:0  server.xml /config/server.xml

# 如果需要root权限执行一些操作的
USER root

# 切回liberty 用户
USER 1001

EXPOSE 9080
server.xml
同上
启动
$ docker build -t hifreud-spring-boot-liberty:latest .
$ docker run --rm -p 9080:9080 hifreud-spring-boot-liberty:latest
验证
$ curl -v http://localhost:9080/hifreud/hello
*   Trying 127.0.0.1:9080...
* Connected to localhost (127.0.0.1) port 9080 (#0)
> GET /hifreud/hello HTTP/1.1
> Host: localhost:9080
> User-Agent: curl/7.79.1
> Accept: */*
>
* Mark bundle as not supporting multiuse
< HTTP/1.1 200 OK
< X-Powered-By: Servlet/3.1
< Content-Type: text/plain;charset=UTF-8
< Content-Length: 5
< Content-Language: en-US
< Date: Tue, 17 May 2022 07:14:48 GMT
<
* Connection #0 to host localhost left intact
hello%
附 - 项目目录