- 在第七节的基础上,在OSGi_equinox_web项目上右键新建一个File,命名为plugin.xml
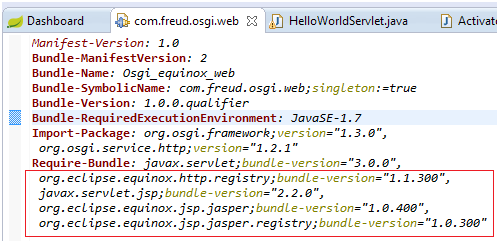
- 在META-INF/MANIFEST.MF文件中修改
Bundle-SymbolicName: com.freud.osgi.web为
Bundle-SymbolicName: com.freud.osgi.web;singleton:=true删除Activator,并且添加红线标注部分
- 修改plugin.xml文件内容如下
<?xml version="1.0"?>
<plugin>
<extension point="org.eclipse.equinox.http.registry.resources">
<resource alias="/files" base-name="/WebContent"/>
</extension>
<extension point="org.eclipse.equinox.http.registry.servlets">
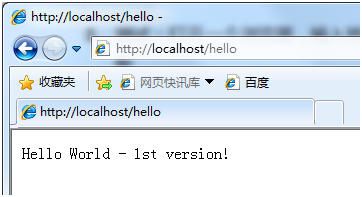
<servlet alias="/hello" class="com.freud.osgi.web.HelloWorldServlet"/>
</extension>
<extension point="org.eclipse.equinox.http.registry.servlets">
<servlet alias="/jsp/*.jsp" class="org.eclipse.equinox.jsp.jasper.registry.JSPFactory:/WebContent/jsp"/>
</extension>
</plugin>- 在项目目录下新建一个文件夹,命名为WebContent
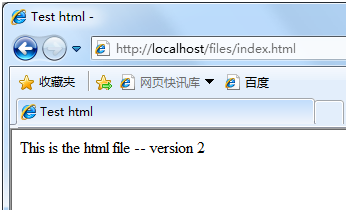
- 在WebContent下新建一个HTML文件,命名为index.html内容如下
<!DOCTYPE html>
<html>
<head>
<meta charset="UTF-8">
<title>Test html</title>
</head>
<body>
This is the html file -- version 2
</body>
</html>- 在WebContent目录下新建一个文件夹,命名为jsp,在jsp下新建一个jsp文件,命名为index.jsp,其内容为
<%@ page language="java" contentType="text/html; charset=ISO-8859-1"
    pageEncoding="ISO-8859-1"%>
<!DOCTYPE html PUBLIC "-//W3C//DTD HTML 4.01 Transitional//EN" "http://www.w3.org/TR/html4/loose.dtd">
<html>
<head>
<meta http-equiv="Content-Type" content="text/html; charset=ISO-8859-1">
<title>Test jsp</title>
</head>
<body>
This is the jsp file -- version 3
</body>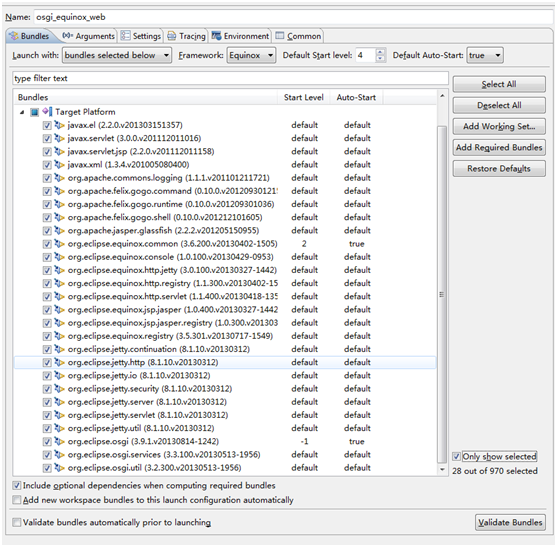
</html>- 运行,以下为运行的Configuration
- 测试:打开一个浏览器,输入地址:http://localhost/files/index.html,得到结果如图
- REST测试:打开一个浏览器,输入地址:http://localhost/hello,得到结果如下图
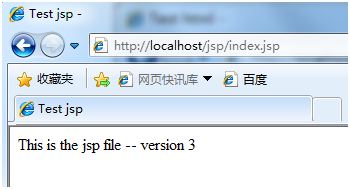
- 测试:打开一个浏览器,输入地址:http://localhost/jsp/index.jsp,得到结果如下图
参考资料
视频教程 : http://v.youku.com/v_show/id_XNDE1NzU0OTY0.html
Equinox OSGi官网 : http://www.eclipse.org/equinox/
林昊 : 《OSGi原理与最佳实践》
Richard S. Hall : 《OSGi实战》