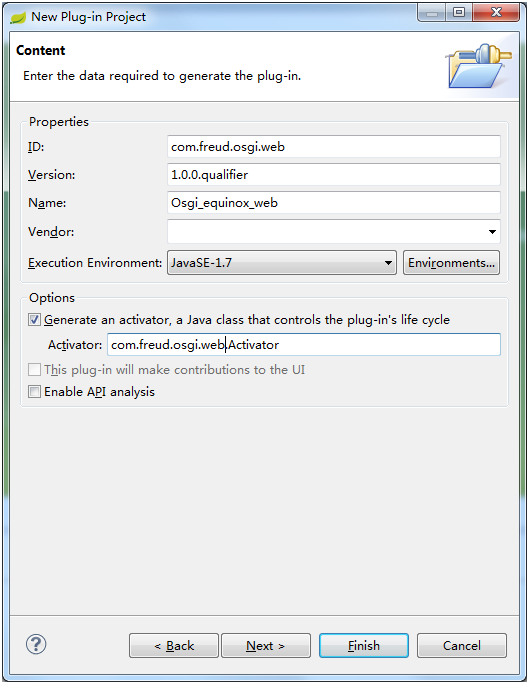
- 新建一个Plug-in Project,命名为OSGi_equinox_web
- 下一步,在接下来的页面输入如下内容,然后finish
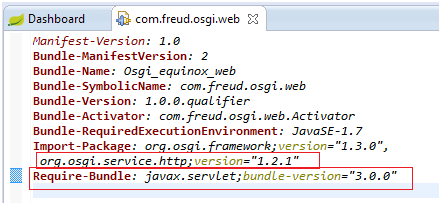
- 在META-INF/MANIFEST.MF文件中修改如下(红色标记部分为添加内容)
- 在com.freud.osgi.web下新建一个类HelloWorldServlet,内容如下
package com.freud.osgi.web;

import java.io.IOException;

import javax.servlet.ServletException;
import javax.servlet.http.HttpServlet;
import javax.servlet.http.HttpServletRequest;
import javax.servlet.http.HttpServletResponse;

public class HelloWorldServlet extends HttpServlet {
	@Override
	protected void doGet(HttpServletRequest req, HttpServletResponse resp)
			throws ServletException, IOException {
		resp.getWriter().write("Hello World - 1st version!");
	}
}- 修改com.freud.osgi.web包下的Activator文件内容为如下
package com.freud.osgi.web;

import org.osgi.framework.BundleActivator;
import org.osgi.framework.BundleContext;
import org.osgi.service.http.HttpService;

public class Activator implements BundleActivator {

	private static BundleContext context;

	private HttpService httpService;

	static BundleContext getContext() {
		return context;
	}

	public void start(BundleContext bundleContext) throws Exception {
		Activator.context = bundleContext;

		httpService = context.getService(context
				.getServiceReference(HttpService.class));

		httpService.registerServlet("/hello", new HelloWorldServlet(), null,
				null);
	}

	public void stop(BundleContext bundleContext) throws Exception {
		httpService.unregister("/hello");
		Activator.context = null;
	}

}- 运行:在项目上右键 - Run as -> Run configuration
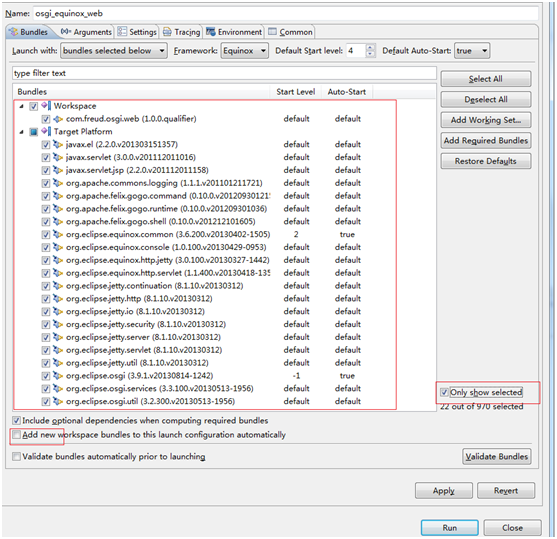
- 在OSGi Framework上右键new,配置如下
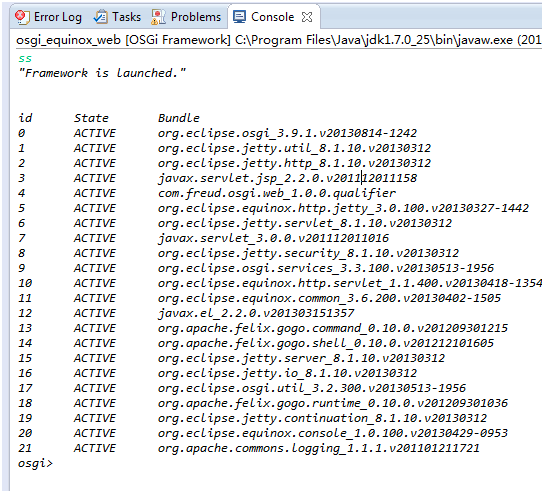
- 运行成功之后,控制台输如ss查看结果如下
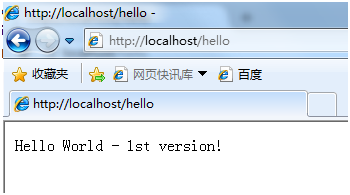
- 打开一个浏览器,在地址栏输入http://localhost/hello,转到,结果为
参考资料
视频教程 : http://v.youku.com/v_show/id_XNDE1NzU0OTY0.html
Equinox OSGi官网 : http://www.eclipse.org/equinox/
林昊 : 《OSGi原理与最佳实践》
Richard S. Hall : 《OSGi实战》